For starters, I’m going to refer your direction to this simple zipper pouch tutorial from Melly Sews. This is the same basic zipper pouch method I use for all of my zipper pouches, plus or minus some extras. In this case the extras include a little flap inside to hold two DS game cartridges, as well as a loop on the outside for a wrist strap.
Nintendo DS cartridges aren’t terribly large…about 1.25″ square, give or take…

And the 2DS itself is about 6″W x 5.5″ H x maybe 1″D at its deepest…


So I cut out my squares for the outside and lining fabric to be about 9″W x 8″ H. I only sew with 1/4″ seam allowances, but I knew I’d end up doing the zipper a little crooked or something, so I’d rather have extra to trim than having too little…


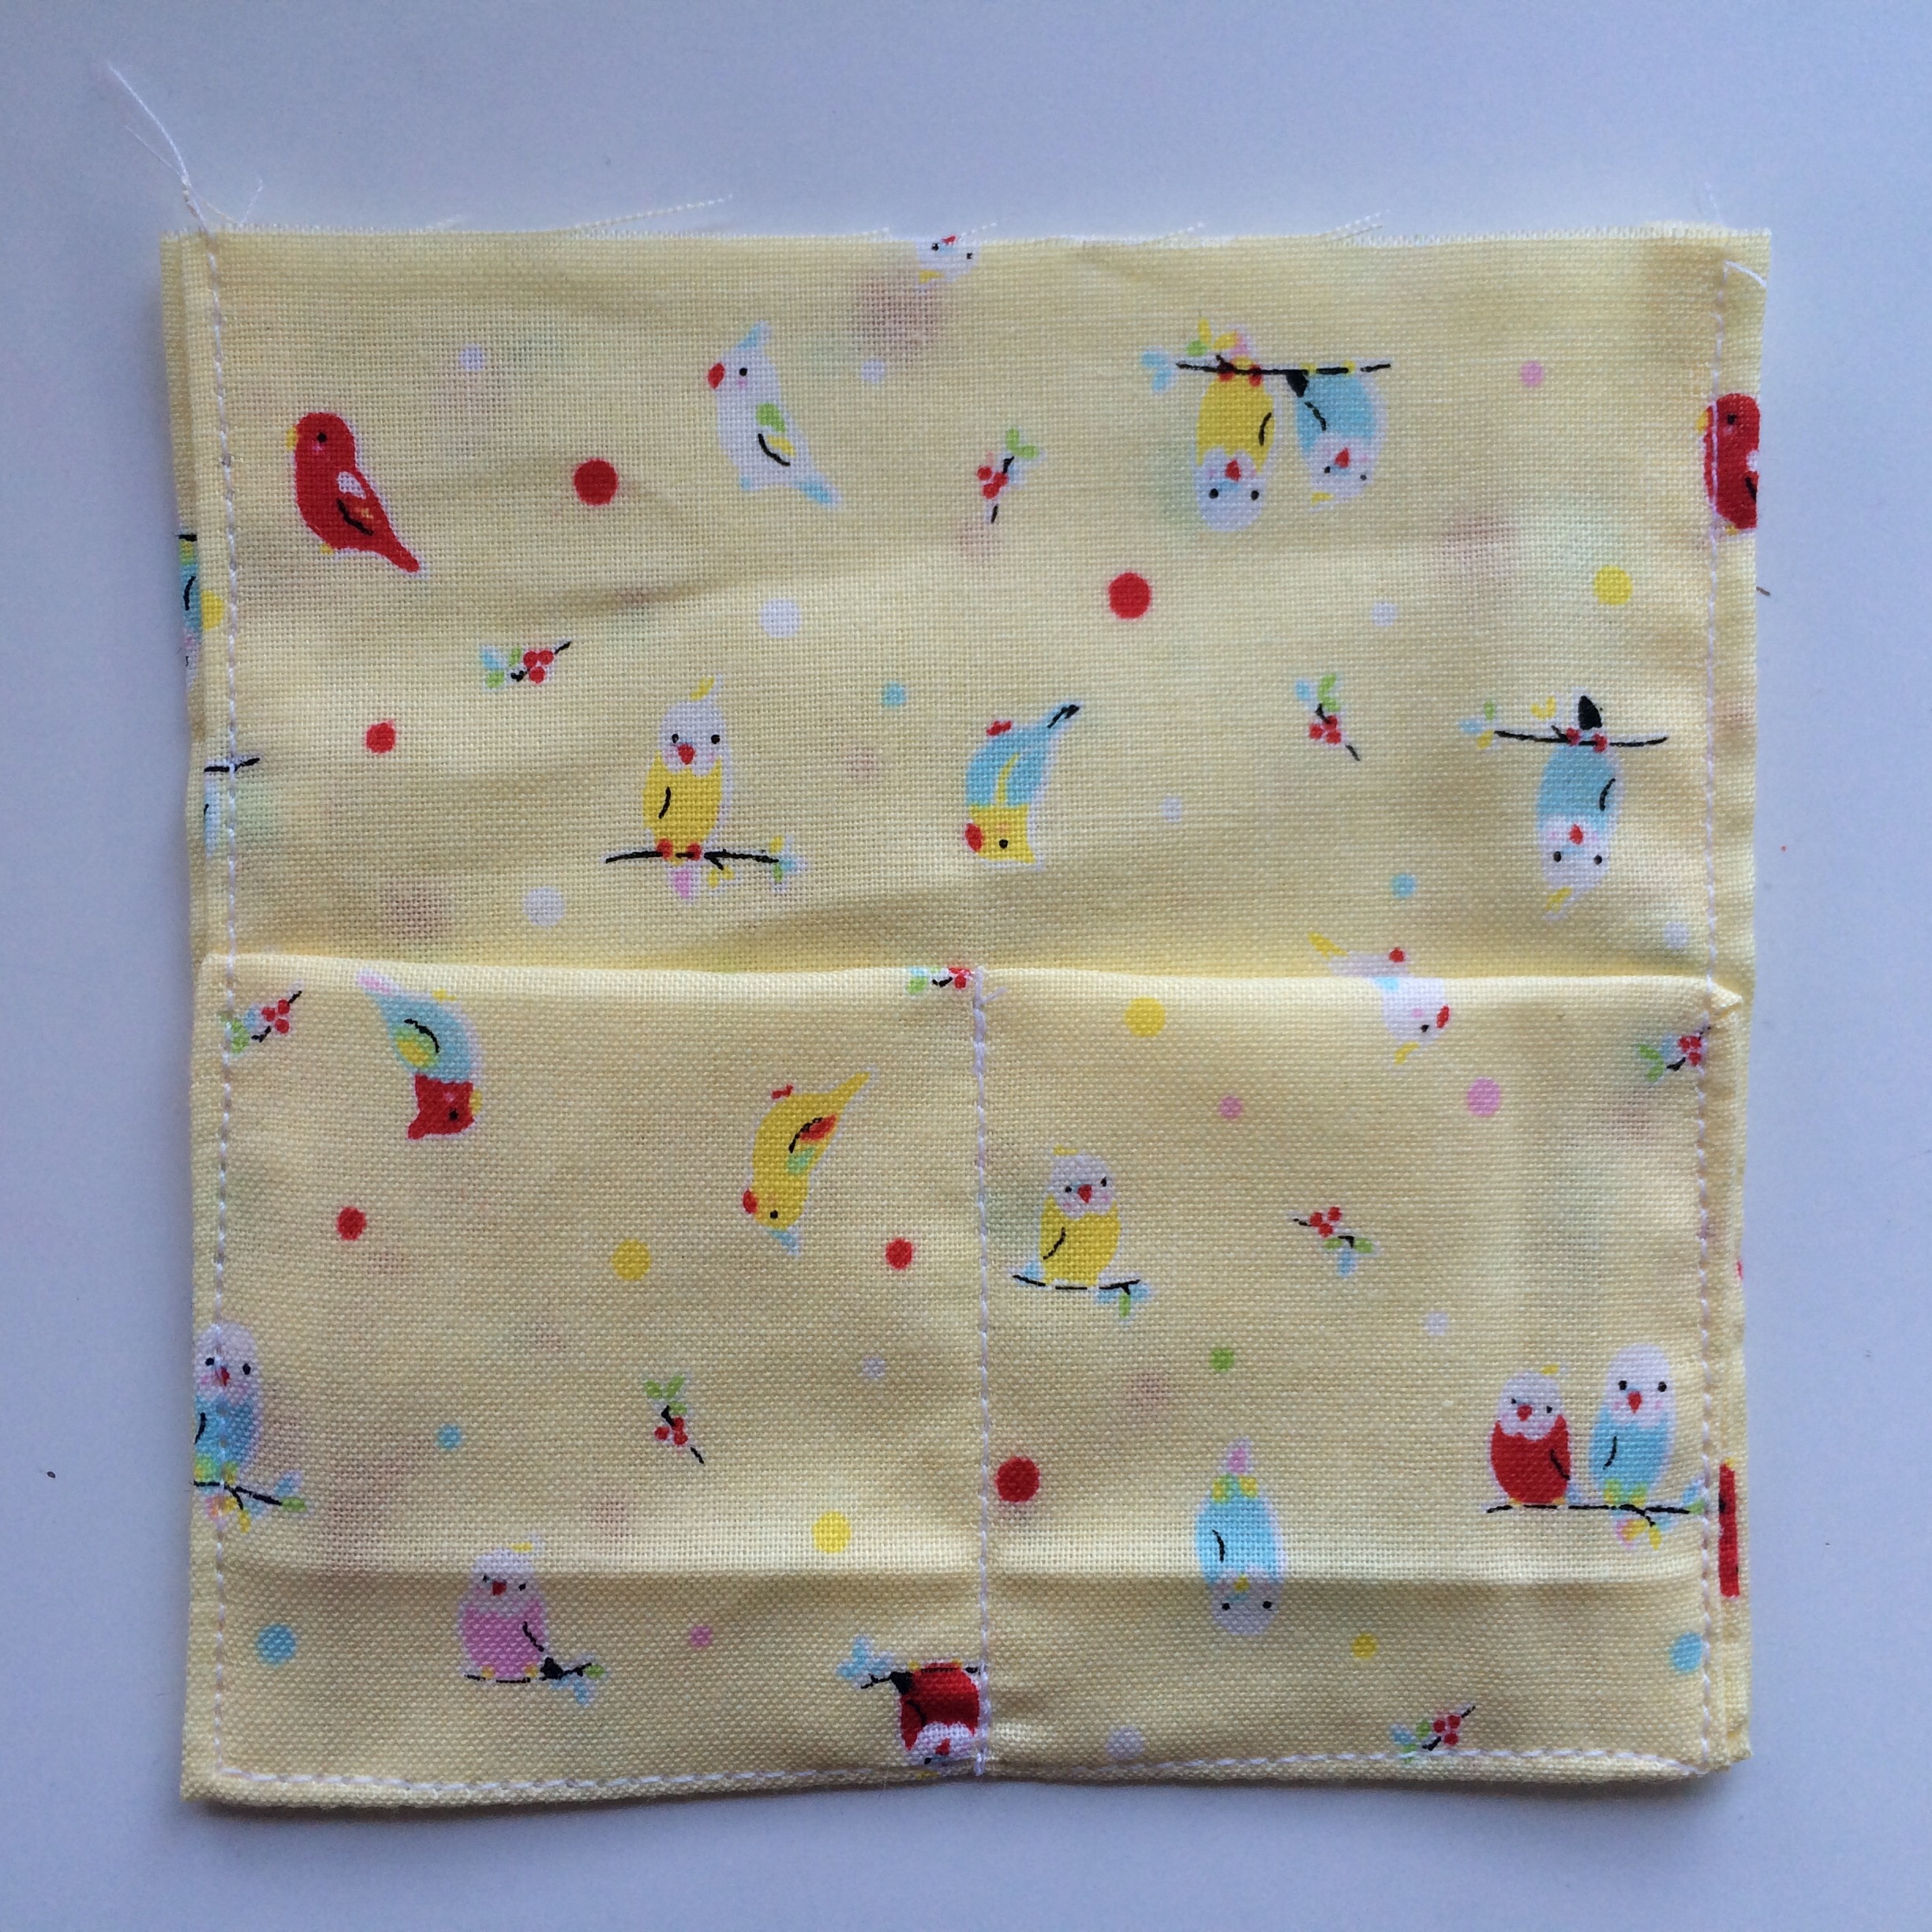
I started by making the inside flappy-cartridge-pouch. I cut a piece of coordinating fabric that was 12″L x 4.5″W…

I flipped it right-sides together lengthwise and sewed up the two long sides, leaving the top short side open to flip it back right side out…


Then I folded up the bottom, clipped it in place, and top stitched it to stay that way…

Plus a line up the middle makes for two separated cartridge storage pockets…
Then this is where I will once again refer to the already-existing pouch-making tutorial, only add in the cartridge-storage-flappy-thing with the outside fabric / inside fabric / zipper sandwich…


The wrist strap I cut about 3.25″W x 12″L…


And I just turned and top stitched down both sides. I never really bother to sew straps like this inside out first, I find flipping them right side out to be too frustrating…

Once again, referring to the already-existing zipper pouch tutorial, I sewed right sides together of the outside fabric (remembering to have the wrist strap in place, too), and then finished the inside lining fabric, and ta-da! I recommend pressing before photographing, but, well…

We’ll see if my daughter will forget about my promise of a zipper pouch for her DS until Christmas rolls around because I would really like to save it as a gift for then 🙂
Also, the overall size of the zipper pouch could easily be altered to accommodate a 3DS or other handheld gaming system, as well as possibly including some quilt batting as some extra padding.